Although I am someone who considers cheese an essential food group, I am happy with the simplest of cheese boards. A single well-made cheese in prime condition, with sturdy bread and good wine, makes a totally satisfying cheese course in my view.
Many years ago, my husband’s boss invited us over for dinner. While he stood at the stove cooking pasta, we guests sipped Champagne and nibbled on nuggets of Parmigiano Reggiano. This bare-bones, elegant appetizer made an impression. Less is more.
Taking the intimidation out of cheese, and the cheese course, is my personal mission. You don’t have to have a tech titan’s budget and a painter’s eye to make an appealing cheese board. You don’t have to spend a small fortune on imported almonds, fancy flatbreads, pricey charcuterie, jams and olives. The cheese is costly enough.
In this Instagram age, the artsy, overstuffed cheese board gets the “likes.” But sometimes you can hardly see the cheese—or reach the cheese—among the rivers of salumi, ramekins of chutney and heaps of berries.
I first learned about fine cheese and the cheese course in France as a college student on a semester abroad. And the French way of serving cheese—typically at the end of a meal, with bread (never crackers) and maybe a leafy green salad or single well-chosen condiment—is still my preference.
I understand the appeal of abbondanza, but it bothers me that composing a cheese board has become akin to performance art. In hopes of reducing the fear factor or sense that you might be doing it all wrong, I offer these tips on how to compose an attractive cheese board that will showcase the cheeses and delight your guests.
Selecting the cheeses
Don’t go to the cheese counter with a shopping list. Ask the cheesemonger what is tasting great that week. These folks taste cheese all day long and they know what’s in good condition and what’s suffering.

Aim for variety. Choosing cheese from different milk types (cow, goat, sheep, water buffalo and mixed milk) is one good strategy, but also aim for contrasting textures (soft to firm), flavors (mild to strong), ages (young to aged) and even shapes.
For a seated dinner party, I typically stop at three cheeses. A tray with more options tends to interrupt the conversation and takes too long to circle the table. You might want to offer more choice on a buffet, with signage, but I wouldn’t go beyond five unless your guest list is large. A few big wedges are more eye-catching than a lot of small ones.
Consider a themed cheese board: all Spanish cheeses, all local cheeses, all American cheeses. Sometimes I ditch the “variety” goal and do what wine lovers do: a comparative tasting of Cheddars from Wisconsin, California and the U.K., for example, or a smackdown between a French Brie and a Brie-style cheese from Vermont.
Figure one ounce of each cheese per serving, although most guests will eat less. That said, any piece smaller than a half-pound looks wimpy on a cheese tray, so I may overbuy for appearance’s sake. At my house, no crumb goes to waste. (See Fromage Fort recipe below.)
Choosing accompaniments
Bread or crackers? I vote for bread—a chewy baguette or pain au levain—because it doesn’t contain fat: cheese already has plenty. I tend to avoid bread with herbs so the cheese can shine, but walnut bread is a tasty complement for soft goat cheeses and creamy blues. I always have gluten-free crackers in the pantry because there’s a good chance someone will ask for them.

I almost never serve cheese before dinner, but if you do, keep the accompaniments savory. Good options include roasted almonds, salted pistachios, warmed fresh walnuts or almonds in the shell, nut mixes, olives or thinly sliced salumi. Sweet condiments like dried fruit, jams and chutneys dull the appetite and destroy dry wines.
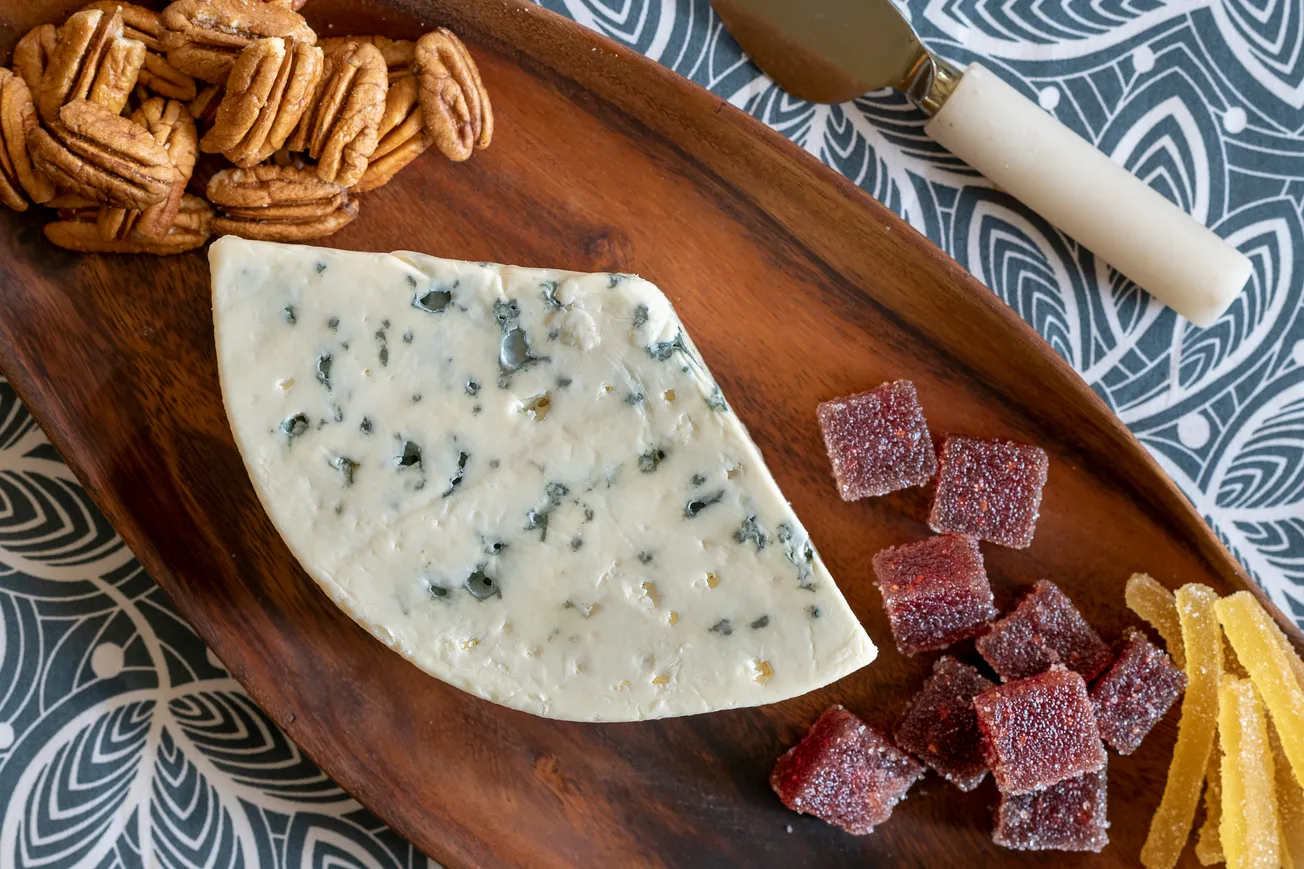
For an end-of-meal cheese course, which at my house replaces dessert, I will stay on the savory side if we intend to drink dry wine. If we have a dessert wine planned, I will likely add some sweet elements to the tray, such as quince paste (excellent with sheep cheese or blue cheese), plump Medjool dates, fresh figs or pears in season, mixed nuts in honey or a homemade jam.
Serving the cheese
Should you pass a tray at the table or cut and plate the cheeses individually for each guest? Passing a tray is easier and allows guests to take just what they want. But serving each guest their own plate makes sense if passing a tray would be awkward or your table is too crowded to set it down. Being a control freak, I like pre-plating so every guest gets a properly cut piece of each cheese and nobody can cut the “nose” off the Brie. (Don’t do that.)
You do not need any special knives for cheese. Those knives with the cutouts in the blade are designed to keep semisoft cheeses like Brie from sticking, but any sharp knives will do. I like to put a knife by each cheese so people don’t use the same implement to cut the blue cheese and the goat cheese. A Parmigiano-Reggiano knife is not a necessity but nice to have for making chunks of hard cheeses like Gouda, Cheddar and Parm.
Leave rinds on and let guests cut them away if desired. Rinds are part of the beauty of the cheese and, in many cases, part of the taste experience.
Bottom line about the cheese course: Don’t overthink it. Buy what you like, arrange it on a platter you like and share it with people you like. As the shoe guys say, just do it.
Janet Fletcher is a Napa food writer, publisher of the Planet Cheese blog and author of three books on cheese. She has taught cheese appreciation to thousands of people, both in the U.S. and abroad.
Janet Fletcher’s Upcoming Cheese Classes
“World Cheese Tour”
Tuesdays monthly from February-November
5:30 p.m.
Winston’s
Napa
Details and reservations
“Wine & Cheese Master Class”
Thursday, Nov. 9
6:00 p.m.
Mia Carta
Napa
Details and reservations
“Red, White & Cheese: A Smackdown”
Saturday, Nov. 18
11 a.m.
Frog’s Leap Winery
Rutherford
Details and reservations
Cheese O’Clock: Time to Party!
Thursday, November 30
5:00 p.m. - 6:00 p.m.
A virtual tasting via Zoom
Details
“Wine & Cheese: Party On!”
Wednesday, Dec. 6
6:00 p.m.
Mia Carta
Napa
Details and reservations
Fromage Fort
From The Cheese Course by Janet Fletcher (Chronicle Books)
If you regularly buy cheese, you can’t help but amass little leftover chunks that are too small to serve but too big to throw away. When you can’t see any other future for them, toss them in the food processor and make fromage fort (“strong cheese”), a cheese spread that’s appealing on crackers or warm toast. Spread on toasted baguette slices to accompany a green salad.
To my taste, fromage fort is always better when there’s a little blue cheese in the blend. It will last for several days, refrigerated.
Ingredients
- 1⁄2 pound assorted cheeses (weight after trimming)
- 1 small clove garlic, thinly sliced
- 2 tablespoons dry white wine or sherry, or more as needed
- 1 teaspoon brandy
Instructions
Remove any rinds. If the cheeses are hard, grate them coarsely. Put all the cheese in a food processor with the garlic and 2 tablespoons wine. Puree, adding more wine if needed to make a creamy, well-blended mixture. Add the brandy and puree again. Transfer to a ramekin. Use immediately or cover and refrigerate, but bring to room temperature before using.
Makes 1 cup


